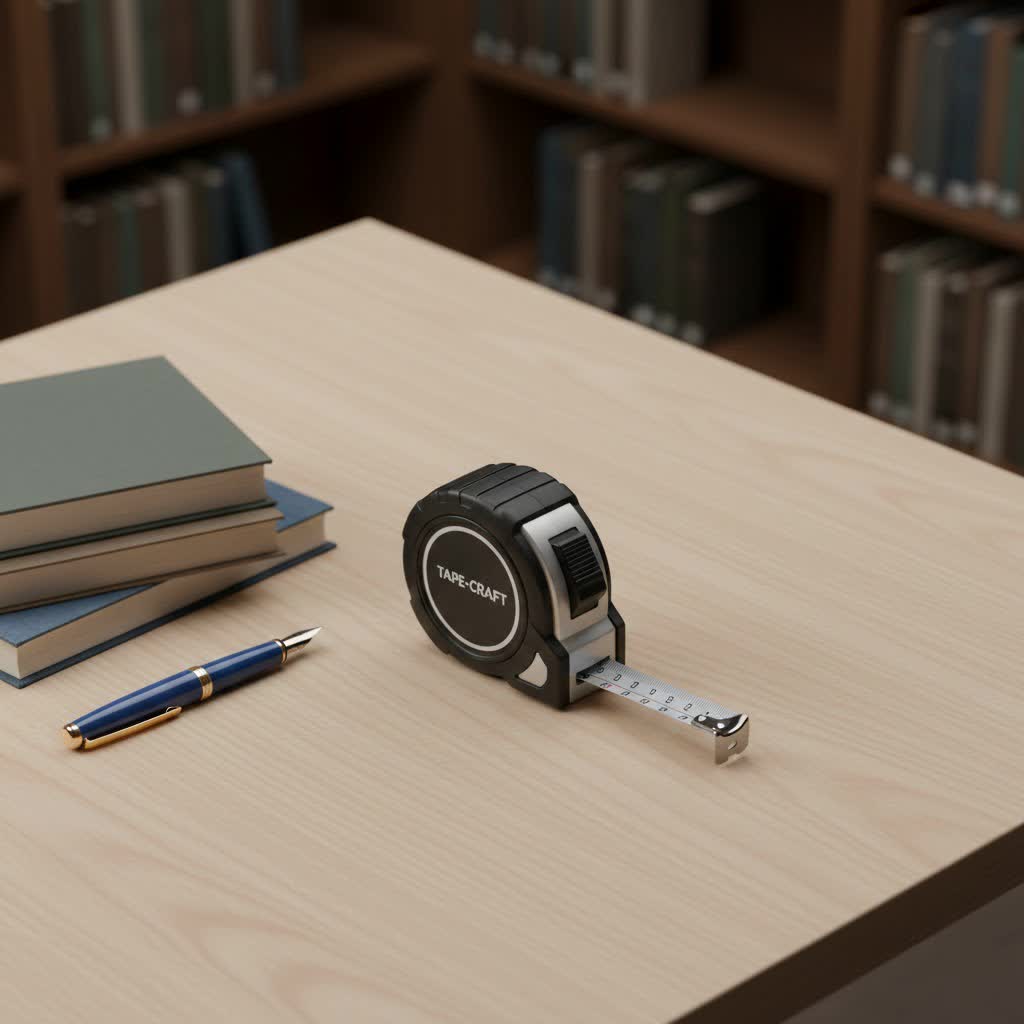
For anyone venturing into DIY, construction, or even simple home projects, the tape measure is an indispensable tool. It might seem straightforward, but mastering its nuances can elevate your precision and the quality of your work. If you’ve ever felt like a “dummy” when faced with its intricate markings or wondered about the best type to use, this comprehensive guide is for you. We’ll demystify the tape measure, ensuring you can measure with confidence and accuracy every time.
What is a Tape Measure and Why is it Essential?
At its core, a tape measure is a flexible ruler, designed for measuring lengths and distances. Unlike rigid rulers, its ability to coil into a compact case makes it incredibly versatile for both short and long measurements, around corners, and over irregular surfaces. Its invention revolutionized various trades, offering portability and extended reach that traditional rulers couldn’t match. From carpentry and plumbing to interior design and tailoring, accurate measurements are the foundation of any successful project, making the tape measure an absolutely critical tool in any toolkit.
Historically, flexible measuring tools originated in tailoring with cloth tapes. The modern, self-retracting metal tape measure, familiar to us today, gained widespread popularity in carpentry after innovations like Hiram Farrand’s “Rapid Rule” were patented and later acquired by companies such as Stanley Works, solidifying its place as a staple in every professional and DIY enthusiast’s arsenal.
It’s also worth clarifying a specific, niche interpretation of “dummy tape measure.” In some specialized fields like woodworking or metal fabrication, a “dummy tape measure” might refer to permanently mounted, self-adhesive metric or imperial scales fixed onto workbenches, miter tracks, or machinery. These are not retractable tools but rather static reference lines designed for consistent, repeatable precision, eliminating human error from manual handling. However, for most users and for the purpose of this guide, when we talk about tape measures, we’re referring to the common, retractable types.
Common Types of Tape Measures and Their Applications
The world of tape measures offers more variety than you might initially think, each designed for specific tasks and environments. Understanding these differences will help you choose the right tool for your project.
Steel Tape Measures
These are the most common type, recognized by their rigid, metal blade that can extend a significant distance without buckling, yet still retract into a compact case.
- Characteristics: Durable, strong, often feature a curved blade for increased rigidity, and come in various lengths (e.g., 10-35 feet or 3-10 meters).
- Pros: Excellent for general construction, woodworking, and home improvement where precision over longer, straight distances is needed. The stiffness of the blade allows for single-person measurements over moderate lengths.
- Cons: Can be susceptible to rust if exposed to moisture, and the metal blade can conduct electricity, posing a hazard in certain situations. The retraction mechanism can sometimes be aggressive.
- Applications: Framing, cabinetry, measuring room dimensions, DIY projects.
Fiberglass Tape Measures
|
Our Picks for the Best Tape Measure in 2026
As an Amazon Associate I earn from qualifying purchases.
|
||
| Num | Product | Action |
|---|---|---|
| 1 | GDMINLO Soft Tape Measure Double Scale Body Sewing Flexible Tailor Craft Vinyl Ruler for Weight Loss Medical Body Measurement, Has Centimetre Scale on Reverse Side 60-inch(White) |

|
| 2 | Milwaukee Tool 48-22-7125 Magnetic Tape Measure 25 ft x 1.83 Inch, 2 Pack |
|
| 3 | DEWALT Atomic Compact Series 30 ft. Tape Measure (DWHT38130S) |
|
| 4 | Milwaukee 48-22-0325 Compact Wide Blade Magnetic Tape Measures |
|
| 5 | Amazon Basics Self-Locking Tape Measure, MID Accuracy, 16-Feet (5-Meters), Black, Yellow |
|
| 6 | iBayam 2 Pack Tape Measure Measuring Tape for Body Fabric Sewing Tailor Cloth Knitting Vinyl Home Craft Measurements, 60-Inch Soft Fashion Pink & Retractable Black Double Scales Rulers for Body Weight |
|
| 7 | 4-in-1 Digital Laser Tape Measure,328ft Laser Distance Meter with Cross-Line Laser,16FT AutoLock Tape,Rechargeable,Backlit LCD,Waterproof,for DIY & Construction |
|
| 8 | CRAFTSMAN 25-Ft Tape Measure with Fraction Markings, Retractable, Self-Locking Blade (CMHT37225) |
|
| 9 | Stanley FMHT74038A FatMax 25 Foot Tape Measure 2PK |
|
| 10 | Amazon Basics Retractable Tape Measure with Push Button, Easy to Use, 16 Feet, Pink |
|
A great alternative, particularly for non-conductive applications or when measuring softer materials.
- Characteristics: Made from a non-conductive fiberglass material, often housed in an open reel or closed case. They are more flexible than steel tapes.
- Pros: Safer around electrical work, lighter, and more flexible, making them ideal for measuring curved surfaces. They are also resistant to rust and less prone to kinking. Many are designed to withstand outdoor conditions.
- Cons: Less rigid than steel tapes, making single-person measurements over long distances more challenging. They can stretch slightly over time or with heavy use, potentially affecting accuracy.
- Applications: Landscaping, surveying, tailoring, measuring fabric, plumbing, electrical work, or any situation requiring a non-conductive tool.
Laser Distance Measurers
While not traditional “tape measures,” these electronic devices offer incredible speed and precision for certain tasks.
- Characteristics: Use a laser to measure distances, displaying the result digitally. Some models can calculate area, volume, and even indirect measurements.
- Pros: Extremely fast and accurate for point-to-point measurements, especially over long distances or in hard-to-reach areas. Reduces human error significantly.
- Cons: Requires a clear line of sight, can be less accurate on reflective or transparent surfaces, and generally more expensive than manual tapes. Not ideal for measuring around curves or for very short, intricate tasks.
- Applications: Construction site layouts, real estate appraisals, interior design, estimating materials, quick measurements in large spaces.
Digital Tape Measures
These combine the tactile feel of a traditional tape with the convenience of digital readouts.
- Characteristics: Feature a standard retractable blade but include a digital screen that displays measurements, often with memory functions and unit conversion capabilities.
- Pros: Easy to read, reduces errors from misinterpreting fractional markings, offers quick unit conversions (e.g., inches to centimeters), and some can store measurements.
- Cons: Requires batteries, can be more expensive than purely mechanical tapes, and some users might still prefer the traditional analog feel.
- Applications: Any task where quick, clear, and precise digital readings are beneficial, such as furniture making, crafting, or detailed carpentry.
Key Factors When Choosing a Tape Measure
Selecting the right tape measure can significantly impact the accuracy and efficiency of your work. Consider these essential criteria to make an informed choice.
Length and Accuracy
The first consideration is how far you need to measure.
- Required Length: Tape measures come in various lengths, typically from 10 feet (3 meters) for small projects to 100 feet (30 meters) or more for large construction sites. Choose a length slightly longer than your maximum anticipated measurement to avoid needing multiple stretches.
- Accuracy Standards: All tape measures have a certain tolerance for error. For most DIY and professional work, a tape measure that meets Class I or Class II accuracy standards is sufficient. For “dummies” or beginners, focusing on clear, legible markings is paramount to ensure you can read it accurately.
- Measurement Systems: Decide whether you need imperial units (feet, inches, fractions), metric units (meters, centimeters, millimeters), or a combination of both. Many tapes feature both systems, with imperial often on the top edge and metric on the bottom. Understanding the smallest increment (e.g., 1/16th of an inch or 1 millimeter) is crucial for precision.
Material and Durability
The materials used in a tape measure’s construction dictate its lifespan and resilience.
- Blade Material: Steel blades are common for their rigidity and strength, while fiberglass blades offer flexibility and non-conductivity. Stainless steel blades provide superior rust resistance, ideal for outdoor or wet conditions.
- Case Material: Cases are typically made from durable plastics (like ABS) or metal (often chrome-plated steel). Plastic cases are lighter and can offer good impact resistance, while metal cases provide superior protection against heavy-duty abuse. Look for cases with a comfortable grip and ergonomic design.
- Resistance: Consider features like impact resistance (especially if it will be dropped frequently), water resistance (for outdoor or wet environments), and rust resistance for the blade. A robust construction ensures your tool lasts through countless projects.
Additional Features
Modern tape measures often come with features that enhance usability and convenience.
- Automatic Blade Lock: This feature allows the blade to stay extended without needing to hold a thumb lock, making single-person measurements much easier. Simply pull the blade out, and it locks in place until you press a release button.
- Magnetic Hook: A small magnet on the end hook allows it to cling to metal surfaces, providing a stable anchor point for measurements, particularly useful when working alone.
- Belt Clip: Essential for professionals and active DIYers, a sturdy belt clip allows you to keep your tape measure easily accessible on your person.
- LED Light: Some digital tape measures or higher-end models include an LED light to illuminate the blade, useful in dimly lit environments.
- Digital Display: For digital tape measures, look for a clear, backlit display that is easy to read in various lighting conditions. Additional functions like memory recall, unit conversion, and center-finding features can be highly beneficial.
Best Tape Measures on the Market: A Comparative Guide
While recommending specific brands is beyond the scope of this general guide, understanding how to compare options will lead you to the best choice. When evaluating tape measures, consider these points:
| Feature | Steel Tape Measure | Fiberglass Tape Measure | Laser Distance Measurer | Digital Tape Measure |
|---|---|---|---|---|
| Material | Steel blade, plastic/metal case | Fiberglass blade, plastic case | Plastic/rubberized case | Steel blade, plastic case |
| Best For | Construction, woodworking | Outdoor, electrical, curved surfaces | Long distances, large areas | Precision, quick digital read |
| Accuracy | High (Class I/II) | Good (can stretch slightly) | Very High | High (digital display) |
| Durability | Very durable (impact, rust varies) | Flexible, weather-resistant | Durable (impact resistance) | Durable (impact resistance) |
| Key Benefits | Rigidity, self-stand, strong | Non-conductive, flexible, lightweight | Speed, precision, calculations | Easy read, unit conversion, memory |
| Limitations | Electrical hazard, rust prone | Less rigid, prone to stretching | Line of sight, cost, battery | Battery dependent, cost |
When you’re shopping, read reviews, look for reputable brands known for quality and accuracy, and always prioritize features that align with your most frequent tasks. For a beginner, an “easy-read” blade with large, clear markings (including fractional call-outs) can be a game-changer.
“The right tape measure isn’t just about length; it’s about the feel in your hand, the clarity of its markings, and how reliably it serves your specific project. Don’t compromise on legibility, especially when starting out.” – Admin, Reviewders.com
How to Use and Maintain Your Tape Measure Correctly
Even the most advanced tape measure is only as good as the person wielding it. Learning proper technique and care ensures accurate results and extends the life of your tool.
Using a Tape Measure Safely and Accurately
- Hook the End: The small metal hook at the end of the tape is designed to grip the edge of an object. The hook is usually slightly loose; this play is intentional and compensates for the hook’s thickness when measuring an inside or outside edge, ensuring accuracy. For an outside measurement, the hook’s thickness is included; for an inside measurement (like the inside of a window frame), the hook pushes in, and its thickness is excluded.
- “Burning an Inch”: For ultimate precision, especially when the end hook might be worn or unstable, “burn an inch.” This involves starting your measurement at the 1-inch mark (or 10cm mark for metric) instead of the very end of the tape. Then, simply subtract that initial inch (or 10cm) from your final reading.
- Read Perpendicularly: To avoid parallax error (where your eye position can skew the reading), always look directly down at the measurement mark, ensuring your line of sight is perpendicular to the tape.
- Keep it Flat and Straight: Ensure the tape blade is flat against the surface you’re measuring and pulled taut. A sag or twist in the tape will lead to inaccurate readings.
- Use the Lock: For longer measurements or when transferring marks, engage the blade lock to keep the tape extended and stable.
How to Read Markings (Imperial and Metric)
Imperial (Inches and Feet):
- Inches: The longest, numbered lines represent full inches. Every 12 inches typically marks a foot, often indicated by a red number or a specific foot designation (e.g., ‘1F’). After a foot mark, inches may restart from 1 or continue numbering.
- Fractions: Between each inch, you’ll find progressively shorter lines representing halves, quarters, eighths, and sixteenths of an inch.
- The longest mark between two inches is the ½-inch mark.
- The next longest marks are the ¼-inch and ¾-inch marks.
- Shorter still are the ⅛-inch marks (e.g., ⅛, ⅜, ⅝, ⅞).
- The shortest, most numerous marks represent 1/16th of an inch.
- Tip: Some “easy-read” or “fractional-read” tapes explicitly print the fraction (e.g., 1/2, 1/4) directly on the blade, which is excellent for beginners.
Metric (Centimeters and Millimeters):
- Centimeters (cm): The longest, numbered lines indicate full centimeters.
- Millimeters (mm): Between each centimeter, there are ten smaller, evenly spaced lines. Each of these represents 1 millimeter. The fifth millimeter mark (half a centimeter) is often slightly longer to aid in quick identification.
- Meters (m): Every 100 centimeters (1000 millimeters) is 1 meter, usually clearly marked on the tape, often in a different color.
- Tip: Metric measurements are typically easier to read for beginners due to their base-10 system, avoiding fractions.
How to Preserve Your Tape Measure
- Clean Regularly: Wipe the blade with a clean, dry cloth after use to remove dust, dirt, and moisture that can cause rust or grit buildup in the mechanism.
- Avoid Abrupt Retraction: Don’t let the blade snap back violently into the case. Guide it gently with your hand to prevent damage to the blade, hook, and internal spring mechanism.
- Store Properly: Keep your tape measure in a dry, protected place, away from extreme temperatures and direct sunlight.
- Inspect for Damage: Periodically check the blade for kinks, tears, or excessive wear. A damaged blade can lead to inaccurate measurements and compromise the tool’s integrity. Also, ensure the end hook is not bent or loose beyond its designed play, as this will affect accuracy.
Common Errors and How to Fix Them
- Kinked Blade: Occurs when the blade is extended too far without support or bent unnaturally. To avoid, support the blade or use a longer tape for longer measurements.
- Inaccurate End Hook: If the hook is bent, gently use pliers to straighten it. If it’s excessively loose or worn, it might be time for a new tape measure, or use the “burn an inch” technique consistently.
- Reading Mistakes: Take your time, double-check your readings, and use the “burn an inch” method for critical measurements. For beginners, choose a tape with high-contrast, easy-to-read markings.
Where to Buy Reliable and Quality Tape Measures
Finding a dependable tape measure is crucial for consistent accuracy. Here’s a guide to purchasing wisely.
Reputable Stores and Online Retailers
- Hardware Stores: Local hardware stores, home improvement centers, and building supply shops typically carry a wide range of tape measures from well-known brands. This allows you to physically handle the tool, check its retraction mechanism, and assess the clarity of its markings.
- Specialty Tool Suppliers: For professional-grade or specialized tape measures (like surveying tapes or those with unique features), specialty tool suppliers often offer a broader selection and more knowledgeable staff.
- Online Marketplaces: Large online retailers offer immense variety, competitive pricing, and user reviews.
- Pros: Convenience, wider selection, ability to compare prices easily, and access to customer feedback.
- Cons: You cannot physically inspect the product before buying, making it harder to judge ergonomics, blade rigidity, or the smoothness of the retraction. Shipping times can vary.
Tips to Avoid Counterfeits and Low-Quality Products
- Buy from Authorized Dealers: Stick to official brand websites, reputable retailers, or authorized distributors. Be wary of unusually low prices from unknown sellers.
- Check Packaging and Branding: Authentic products usually have high-quality packaging and clear, consistent branding. Look for spelling errors or poor print quality, which can be red flags.
- Inspect the Product: Even online, pay close attention to product images. Look for inconsistencies in material, finish, or markings. Read detailed product descriptions.
- Read Reviews: Customer reviews can often highlight issues with quality, accuracy, or authenticity. Filter for verified purchases and look for recurring complaints.
Expert Buying Guide: Tips for Beginners
Navigating the array of tape measures can be daunting, but with a few expert tips, you’ll be well-equipped to make the right choice, even if you’re a complete beginner.
- Start Simple, Focus on Clarity: For your first tape measure, prioritize a clear, easy-to-read blade. Look for large numbers and distinct markings, possibly with fractional call-outs. A basic 25-foot (7.5-meter) steel tape with an auto-lock mechanism is an excellent starting point for most home projects.
- Consider Your Primary Use:
- Home DIY/Woodworking: A standard steel tape (25-30 ft / 7.5-9m) with good blade stand-out and an auto-lock.
- Sewing/Crafting/Curved Surfaces: A fiberglass tape, as its flexibility is key.
- Large-Scale Projects/Professional Use: Consider longer steel tapes (50-100 ft / 15-30m) or even a laser measurer for efficiency.
- Feel the Weight and Ergonomics: If buying in person, pick up the tape measure. Does it feel balanced? Is the case comfortable to hold? Can you easily operate the lock and retraction? These seemingly small details make a big difference during prolonged use.
- Test the Hook: The end hook should have a slight, intentional play. Ensure it’s sturdy and not easily bent, as a compromised hook will lead to inaccurate measurements.
- Don’t Skimp on Quality: While tempting to buy the cheapest option, a quality tape measure will save you frustration and rework in the long run. It’s an investment in accuracy.
Mistakes to Avoid When Buying and Using
- Ignoring the End Hook: Never assume the end hook is always perfectly accurate. Understand its designed movement and use techniques like “burning an inch” for critical precision.
- Measuring with a Sagging Tape: Always ensure the tape is pulled taut and flat, especially over longer distances.
- Not Double-Checking: For critical cuts or layouts, measure twice (or even thrice) before you cut. This habit is the hallmark of a meticulous craftsman, regardless of experience.
- Letting it Snap Back: This damages the blade and internal mechanism over time. Guide the tape back gently.
- Using the Wrong Tool for the Job: Don’t try to measure a large room with a short tailoring tape, or a curved pipe with a rigid steel tape. Matching the tool to the task is fundamental.
Conclusion
The tape measure, in its various forms, remains an indispensable tool for anyone who values precision and quality in their work. From understanding its fundamental purpose and diverse types to mastering the art of reading its markings and maintaining its integrity, this guide aims to transform any “dummy” into a confident measurer. By choosing the right tool for your specific needs and adopting best practices in its use and care, you unlock a world of accurate possibilities.
What measurement challenge are you ready to conquer next with your newfound tape measure expertise?
Frequently Asked Questions
What does “blade stand-out” mean for a tape measure?
Blade stand-out refers to how far the tape measure’s blade can extend horizontally before it buckles or collapses under its own weight. A higher stand-out distance indicates a stiffer, higher-quality blade, making single-person measurements over longer distances much easier and more reliable. This is a key indicator of a tape measure’s quality and utility for certain tasks.
Why is the end hook on my tape measure loose? Is it broken?
No, the looseness of the end hook is typically an intentional design feature, not a defect. It compensates for the hook’s thickness. When measuring an outside edge (pushing the hook against a surface), the hook’s thickness is included in the measurement. When measuring an inside edge (hooking onto a surface), the hook slides in to exclude its thickness. This ensures consistent accuracy for both types of measurements.
Can I use a regular tape measure for electrical work?
While a steel tape measure can technically take measurements for electrical projects, it poses a significant safety risk because metal conducts electricity. For any work near live circuits or in environments with electrical hazards, it is strongly recommended to use a fiberglass tape measure. Fiberglass is non-conductive, offering a much safer alternative.
Pet products vetted on real animals
Practical specs, not advice. Unsubscribe anytime.
